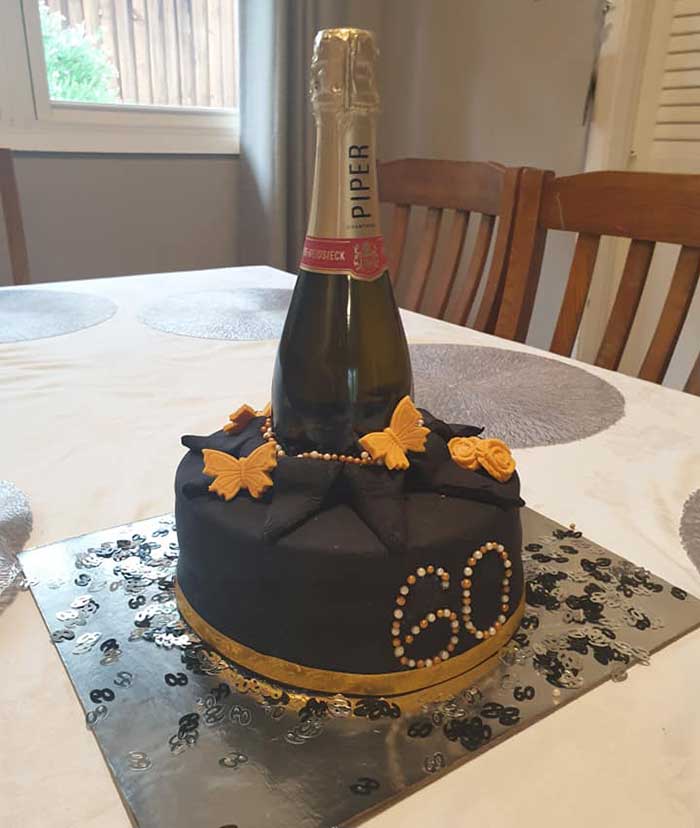
If there’s two things we can’t get enough of at parties, it’s cake and champagne. So, why not combine the two into a fabulous DIY champagne bottle cake that guests can enjoy with a glass of the sparkling! This cake is so nice and easy to recreate, so you can celebrate in style.
DIY Champagne Bottle Cake: ingredients
Ready to replicate this look yourself? Let’s get started! No matter what theme your party is, you can create a stunning DIY champagne cake to match. Simply mix up the colours of the fondant and decorations to match.
Here’s what you will need:
- Cake! You can either grab to mud cakes from Coles/Woolworths, or bake a cake yourself.
- Ganache: again, you can buy from the shops or make yourself.
- Fondant: Choose the outside colour of your cake and buy the fondant in that colour. It will save you having to mix it yourself.
- Sprinkles: again, find some sprinkles that match the colour of your theme.
- Ribbon: purchase some ribbon to wrap around the bottom. About 3cm wide.
- Cake board: make sure you have a cake board ready to go that’s big enough.
- Champagne! Let’s not forget the all-important bottle of champagne to go in the middle! Choose anything you like.
Let’s get creating!
Step-by-step Champagne Bottle Cake How To
Step 1:
Bake your cake! Or go to the shops and buy one. If you’re baking, then let it cool before placing in cling wrap and popping in the fridge overnight. This is a great tip that will make it much easier to cover the next day.
Step 2:
Cut your hole! Grab your bottle of champagne and measure a hole in the middle for it to fit. Get cutting! Make sure there is plenty of space to get the bottle in.
Step 3:
Cover in ganache. Your aim is to get the cake as smooth as possible. It’s often easiest to do this in stages: cover in ganache, refrigerate, repeat. Once you’re happy it’s time to roll out the fondant.
Step 4: Cover in fondant
Don’t worry about the hole in the middle. Just cover the cake like you would normally, then cut out the hole. Once the champagne bottle is in, no-one will see inside. Don’t waste time trying to fondant in there!
Pop the champagne bottle in and start creating the ripped edges. These are just made from leftover fondant and stuck on with water.
Step 5: Add the sprinkles
Tip away! Pour some sprinkles into the gap between the champagne bottle and torn edges to create some fun!
Then add the ribbon to the bottom and you’re done. It really is that easy!

