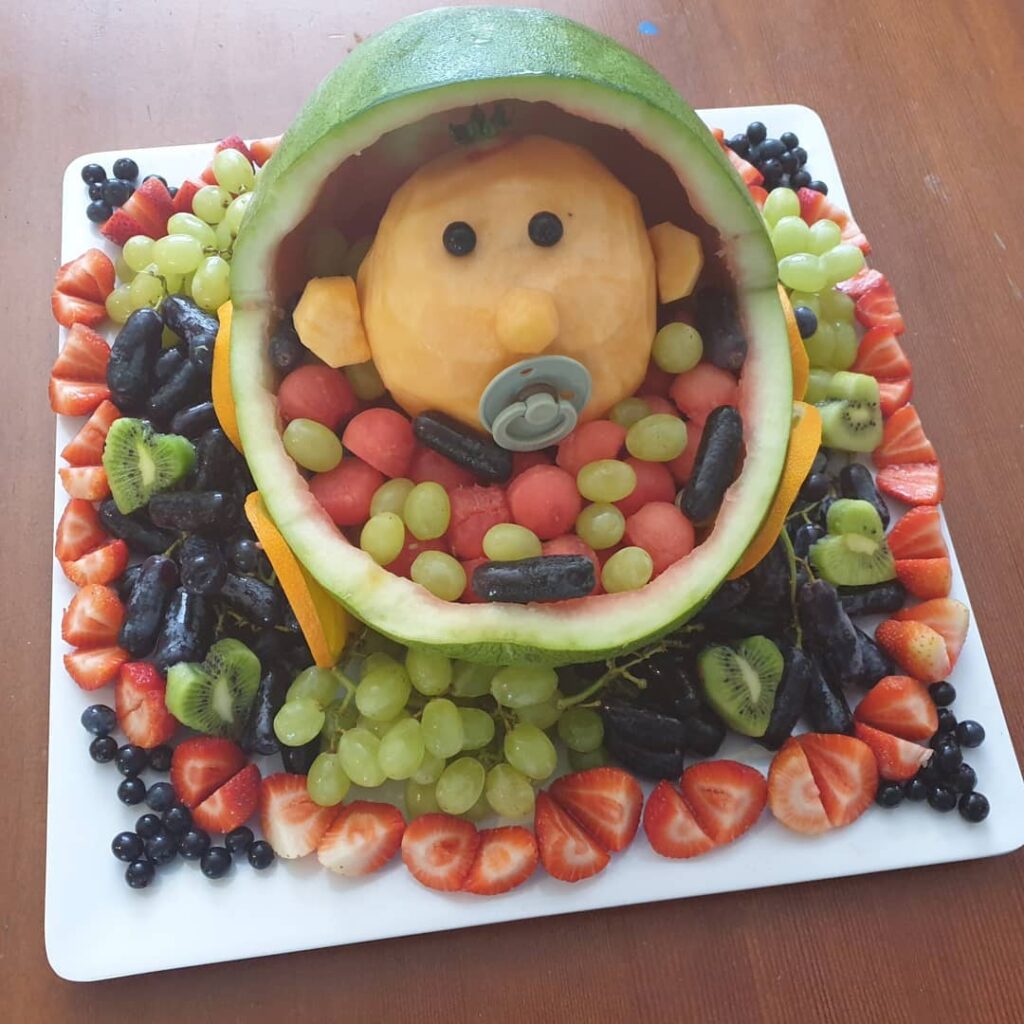
Nothing says baby shower like this adorable fruit salad baby carriage! I was recently asked to bring along a fruit platter to a friend’s baby shower – so naturally I wanted to do something special. I saw this one on Pinterest and knew I had to give it a go. After all, I’m always up for a challenge. Watermelon is a fun fruit to play with. You can see our watermelon shark tutorial here. This one, is a lot easier than it looks!
Disclosure: This post contains an affiliate link, and at no additional cost to you, I’ll earn a small commission if you decide to purchase after clicking through the link. I’ll only ever recommend things that I love and believe will help you, and the decision to purchase is entirely yours!
Fruit Salad Baby Carriage Step By Step
Step 1:
Select your fruit! Here’s what we went with:
- Watermelon (a must)
- Rockmelon (a must)
- Orange
- Blueberries
- Grapes (purple and green)
- Strawberries
- Kiwi Fruit
Step 2:
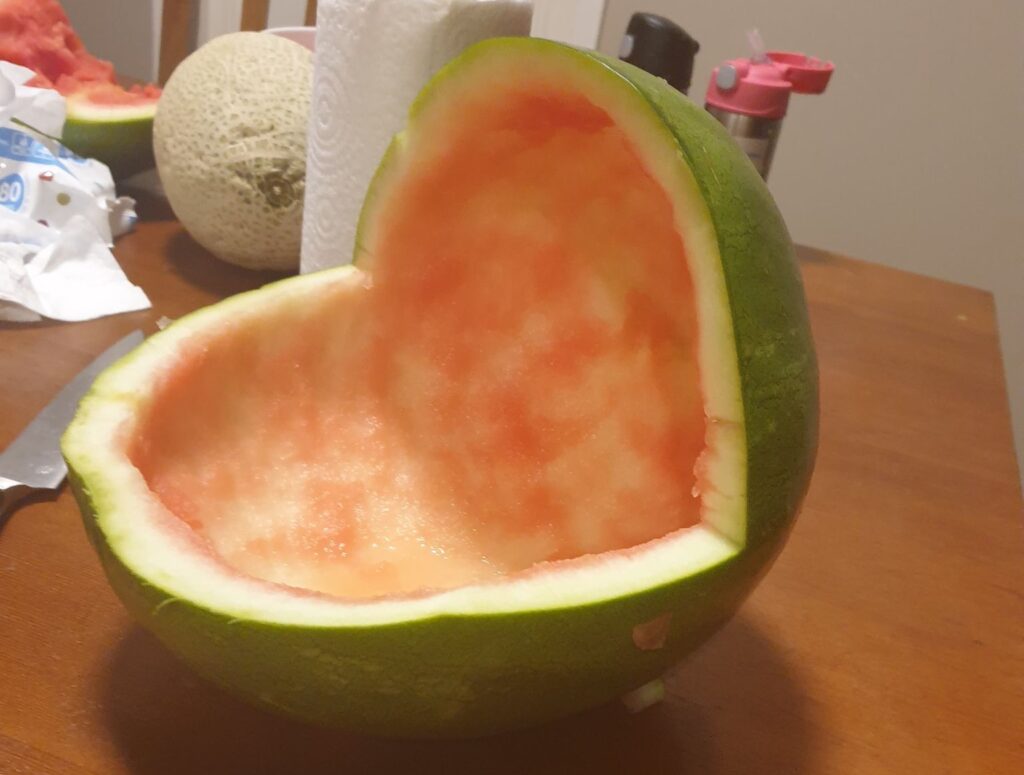
Grab a black texta and draw an outline of where you plan to cut the watermelon. This is the hardest part! But the great thing is, if you make a mistake it’s easy to cover up.
I started in the middle of the watermelon (as it was lying horizontally on the table) and drew a line across about three quarters of the way along.
I drew the same line of the other side. Next, I drew a line up and over the top of the watermelon, so both lines could meet.
With a nice, sharp knife, I cut it out (see below).
Step 3:
Now for the fun part – cutting out the middle of the watermelon.
You don’t want to waste all that good stuff inside. Grab your melon baller and chop out as much as you can with it. Once you’re mostly done, get a spoon and scrap out the remaining watermelon.
Set it aside.
Step 4:
Now onto the rockmelon. I simply used a knife to cut off the skin and then shape the rockmelon into a ball (aka, the baby’s head). Just keep popping it inside the watermelon carriage until you get the right size. With the leftover watermelon, cut out two ears and a nose. Secure them with toothpicks (cut to size so you can’t see them).
Pop in two blueberries for eyes, and the green of a strawberry for a tuft of hair – once aain using a skewer.
When it comes to the dummy, it’s up to you! I cut off the top of the dummy, so it was just the plastic bit left. I cut a little mouth and just propped the dummy in there.
Step 5:
Now it’s time to decorate! The grapes and watermelon balls make the perfect baby blanket. Pop the rockmelon head in first, then get arranging!
You can even add in some wheels. Cut the orange into four slices and secure each circle onto the side of the watermelon with a toothpick with a blueberry on the end.
You can either serve as is, or pop on a platter and surround with other food (like I did). Decorate how you like with your chosen fruits!
If you need more ideas for party themes, read more about them here.
Need more tips when it comes to planning that next important occasion? Check out our DIY party planning checklist and get started today!