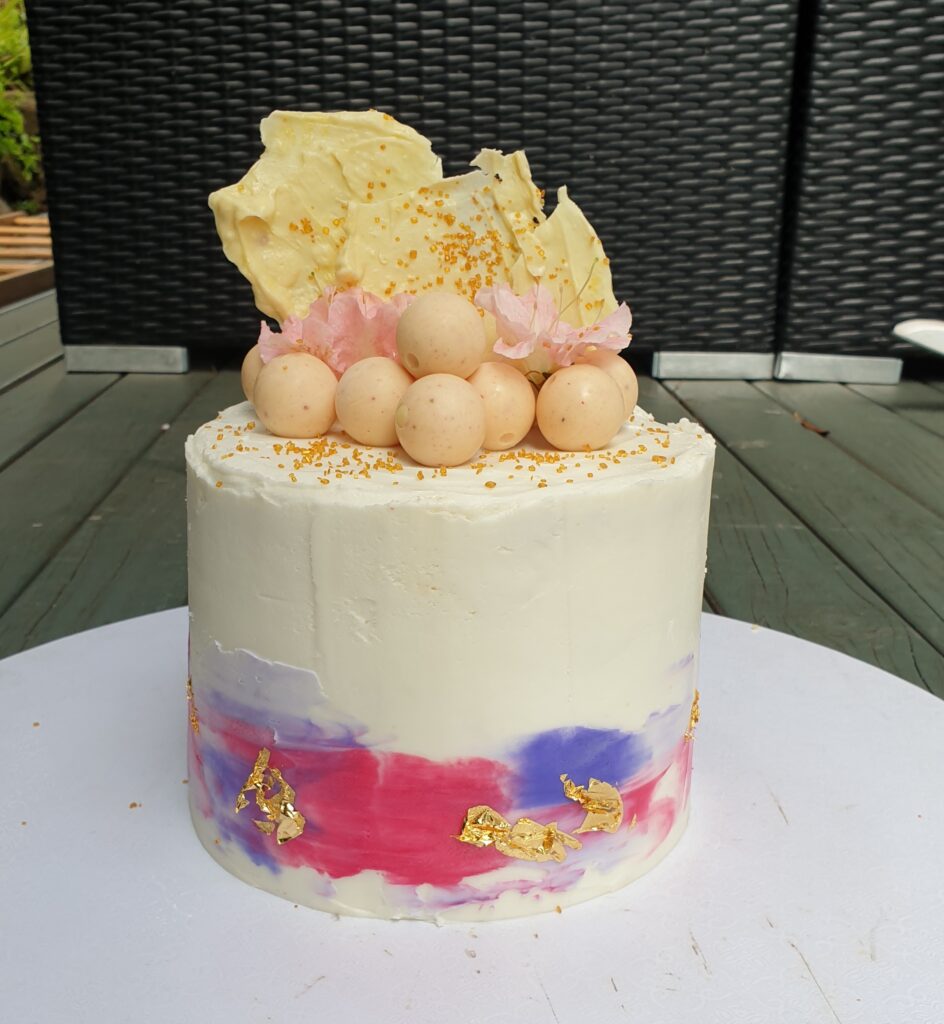
If you are after a cake with a difference, then this is it! It is pretty simple to do if you have ever played with buttercream before, and looks great too!
Disclosure: This post contains an affiliate link, and at no additional cost to you, I’ll earn a small commission if you decide to purchase after clicking through the link. I’ll only ever recommend things that I love and believe will help you, and the decision to purchase is entirely yours!
Making The Cake
This particular cake was a lemon one. I made three lots of the batter, so I could layer the cake and get this effect. Once the cakes are baked, leave them to cool. I then wrapped each one in clingwrap and popped it into the fridge. This stops them from crumbling and gives you something much easier to work with!
Learn more about how to buy the right cake board here.
Adding The Buttercream
White buttercream isn’t easy to make (apparently you can substitute the butter to get the colour). I went with the store-bough variety just from Coles. I set aside three different bowls to colour the buttercream. I popped a couple of drops of violet dye into one to get the deep purple colour. Just one drop into another for the light purple, and a couple of drops of pink for the final colour. You can play around with these colours as much as you like.
First Layer
With a scraper on hand, I did the first, light layer of white buttercream. I popped the cake back in the fridge to set. I then brought it out and added a thick layer of white buttercream the entire way around. I played around, filling in the holes until I got the look I was after. I popped it back in the fridge.
Adding The Watercolour
Next step, watercolour! This was the fun part. Using a knife, I grabbed blobs of one colour and smeared it sound the bottom of the cake. I then repeated with the next two colours and overlapped them. Once I had enough, I grabbed the scraper and smoothed it out. The best part is, you can always go back and add in more colour in spots where it is needed.
Once it was set, I added some gold foil on top. This was easy to use with some tweezers, and my 5-year-old daughter had fun helping with it.
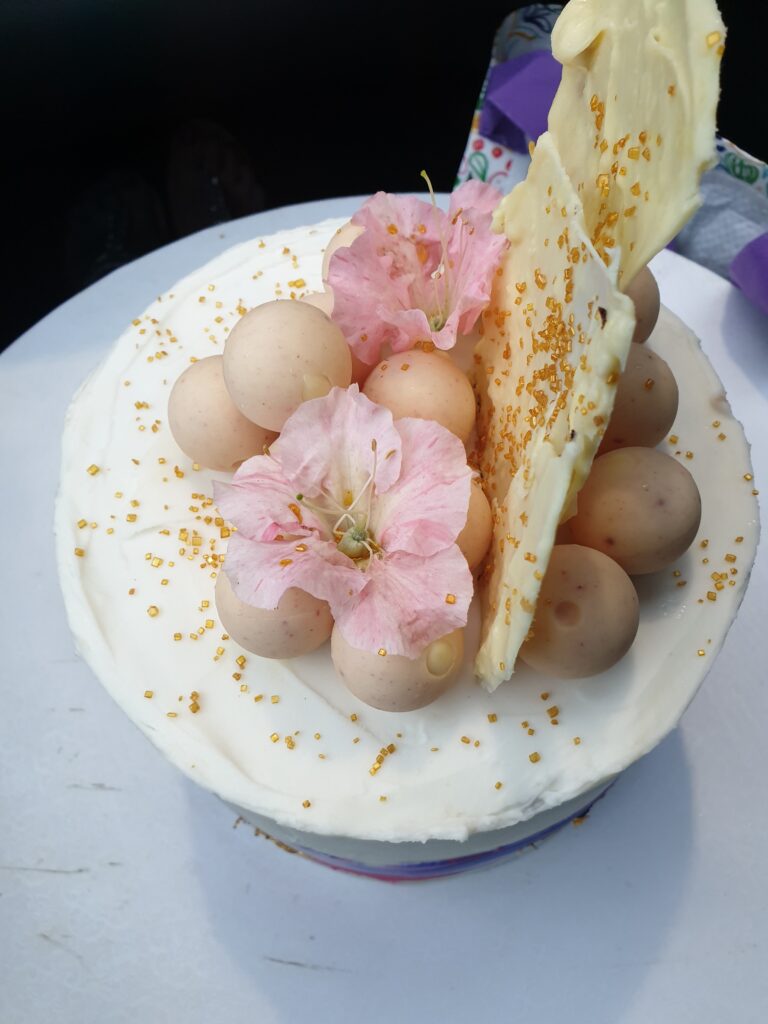
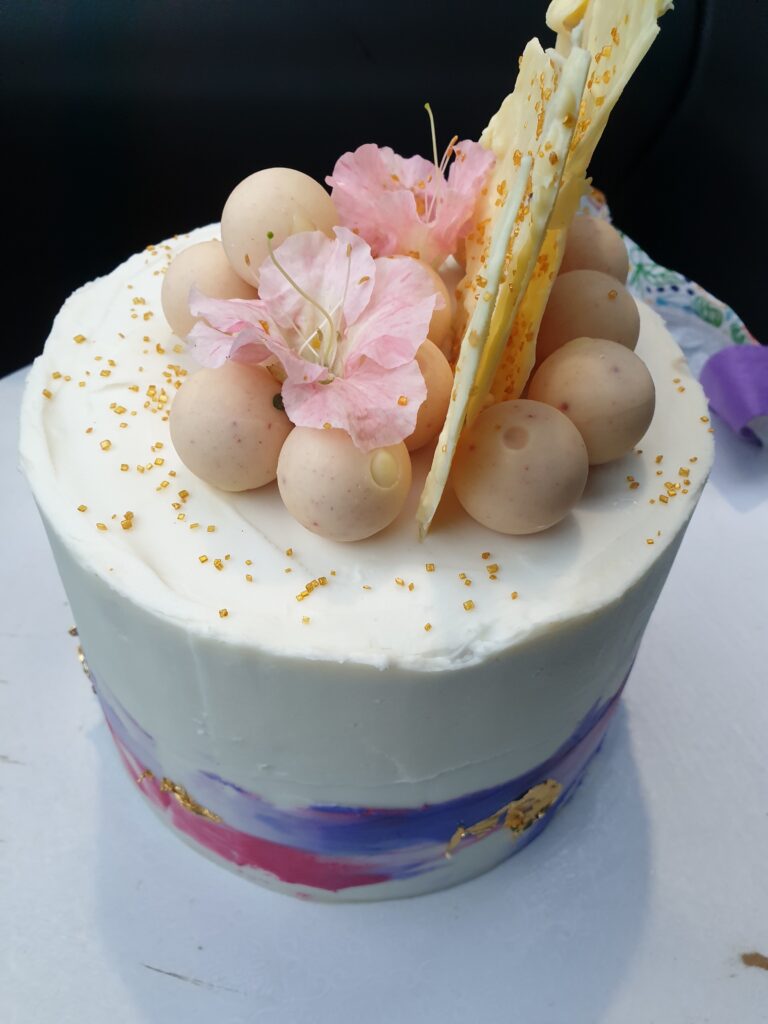
Decorating The Top
Now for the fun part – decorating the top! For this cake I used white chocolate Lindt balls. It took two packets to get this effect. We also made some chocolate bark. You simply heat some chocolate in a water bath on the stove, add a touch of cream and then smear on a baking tray lined with baking paper. I popped it in the freezer to set.
My daughter then added the finishing touches with some flowers (washed) from our garden. Lots of fun!
Need more tips when it comes to planning that next important occasion? Check out our DIY party planning checklist and get started today!