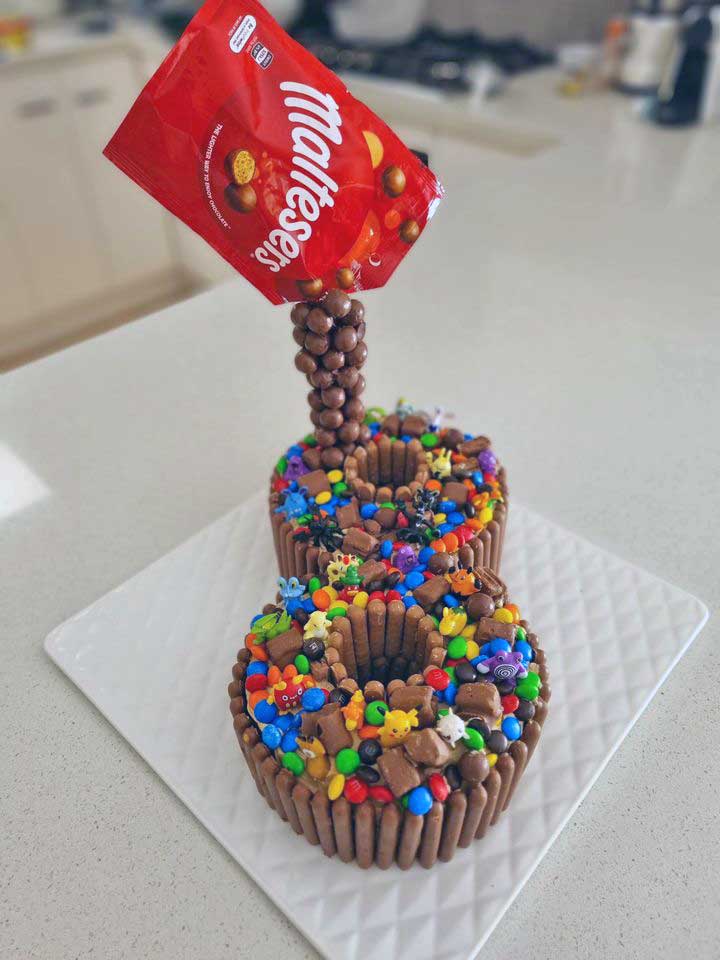
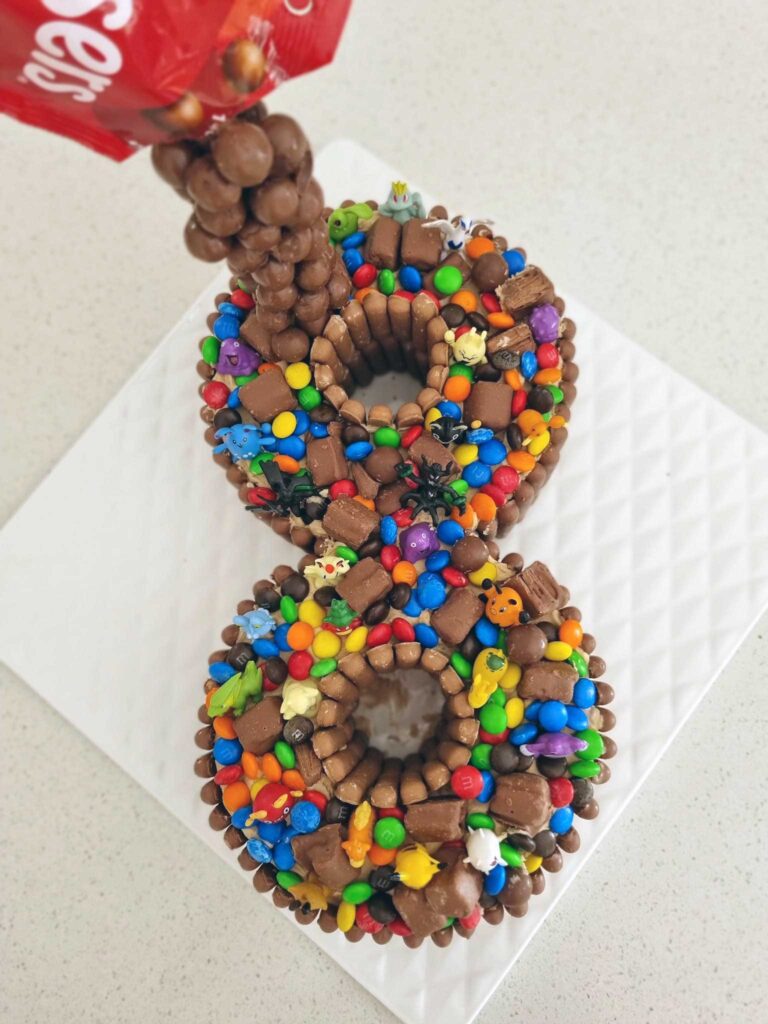
Have you ever wanted to create your very own DIY gravity cake? The perfect thing about it is just how versatile it is. Choose from a round cake, turn it into a number, or go with any shape you like. Chuck enough chocolates on and it’s a pretty wow-worthy result. Lauren shares how she pulled together this DIY gravity cake for her Pokemon loving son’s 8th birthday.
Disclosure: This post on DIY gravity cake contains an affiliate link, and at no additional cost to you, I’ll earn a small commission if you decide to purchase after clicking through the link. I’ll only ever recommend things that I love and believe will help you, and the decision to purchase is entirely yours!
Ingredients:
- 2 x vanilla mudcakes from Woolworths
- 2 x chocolate mudcakes from Woolworths
- Cadbury fingers
- Buttercream icing
- Plastic straw
- Pokemon figurines (shop similar here)
DIY Gravity Cake Method
- Put all four cakes in the freezer for 20 minutes.
- Trim the cakes to size and use a cup to trace and cut out the centre. Place on cake board.
- Crumb coat with buttercream and put them back in the freezer for a further 20 minutes.
- Take them out, buttercream them again and stack on top of each other.
- Decorate with Cadbury fingers around the outside and inside edge.
- Decorate the top with whatever you like! Lauren used twirl bites, maltesers and m&ms and Pokémon figurines.
- Now for the fun part: creating the gravity (the perfect cake topper)! Melt chocolate over a saucepan.
- Grab a plastic straw and dip maltesers into the melted chocolate and stick them to the straw.
Note: do this final step in stages, so you allow time for the chocolate to set so the maltesers don’t slide off.
- Once the straw is covered, thread chop sticks through the straw for stability and then push it into the cake and voila.
Your very own DIY gravity cake!
Need more tips when it comes to planning that next important occasion? Check out our DIY party planning checklist and get started today!

